Sunbeam Rapier Owners Club
Home | Profile | Register | Active Topics | Members | Search | FAQ
Username:
Password:
Save Password
Forgot your Password?

 All Forums
 Sunbeam Rapier Owners Club
 General Chat
 Hooray - Now with pictures.
 New Topic  Reply to Topic
 Printer Friendly
New posts at top
New posts at bottom
Author Previous Topic Topic Next Topic  

JPSH120

United Kingdom
1168 Posts

Posted - 11 Jun 2010 :  21:23:35  Show Profile  Reply with Quote
Finally getting my welding done after 3 long years of waiting. Will hopefully be able to get a few miles in before the end of the year and maybe even attend a few events.


Edited by - JPSH120 on 18 Jun 2010 19:45:15

1922

United Kingdom
549 Posts

Posted - 13 Jun 2010 :  16:28:28  Show Profile  Visit 1922's Homepage  Reply with Quote
Good news. H120s were made for driving, hope you have fun.

Edited by - 1922 on 13 Jun 2010 16:31:29
Go to Top of Page

JPSH120

United Kingdom
1168 Posts

Posted - 14 Jun 2010 :  19:55:35  Show Profile  Reply with Quote
Couldn't agree more!

I had to wait to gain a few years driving experience before Dad let me loose in the H120, now having to look at it in the garage again and not be able to use it is awful.

The only consolation to having lots of rain is that it's fewer potential driving days wasted!!

Go to Top of Page

Holbay120

United Kingdom
177 Posts

Posted - 14 Jun 2010 :  23:17:29  Show Profile  Reply with Quote
That's nice to hear Jason - keeping my fingers crossed for you because I love going out in mine and although I'm not a show off type of person it always atracts attention,most of which is favourable! Regards etc

David McKenna
Go to Top of Page

JPSH120

United Kingdom
1168 Posts

Posted - 15 Jun 2010 :  20:06:45  Show Profile  Reply with Quote
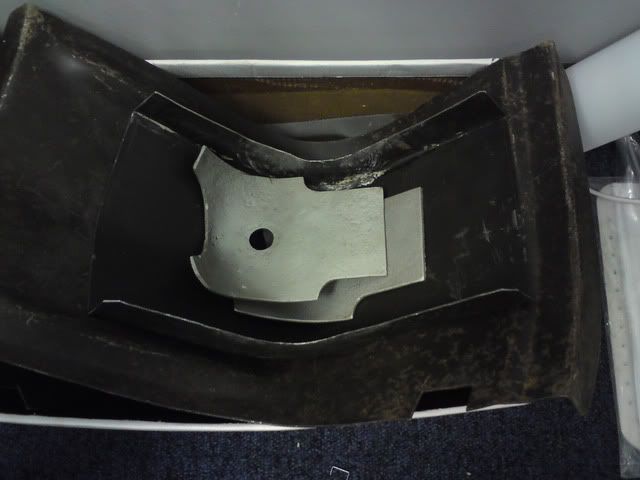
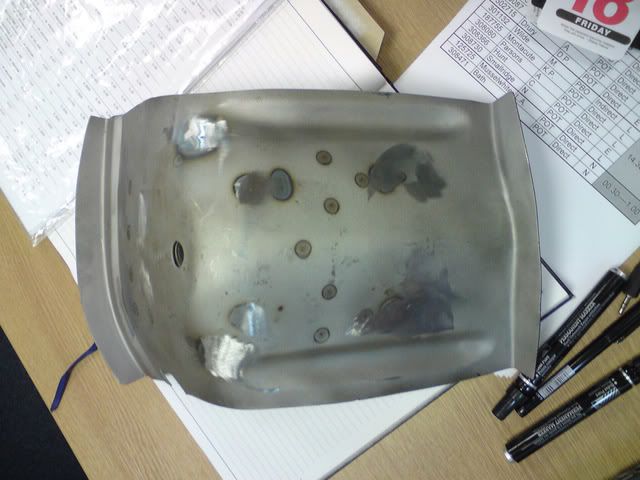
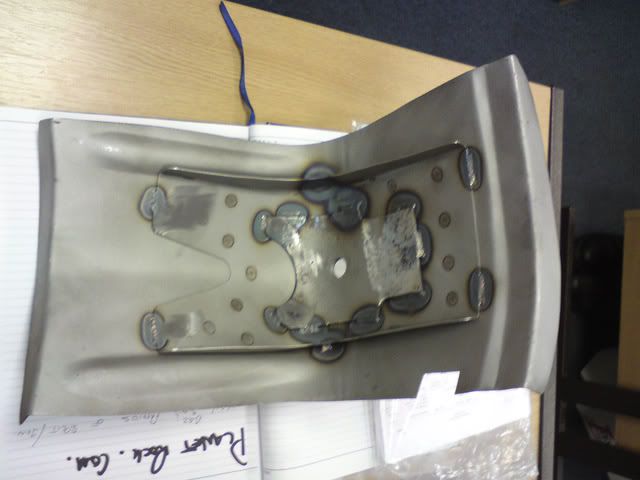
Here's a pic of the new strut top repair panel, complete with the inner strengthening section which has been fabricated from another repair panel. And the smaller strengthening plate that supports the strut.

Once the existing grot has been cut out all of this will be spot welded together before being grafted onto the car.

Can't believe how quickly it's progressing!!


Edited by - JPSH120 on 05 Feb 2013 12:24:39
Go to Top of Page

JPSH120

United Kingdom
1168 Posts

Posted - 18 Jun 2010 :  19:49:58  Show Profile  Reply with Quote
Panels have now all been shot blasted and spot welded* and will hopefully be going on the car next week.

Pictures of the finished article;


* - Working at a firm with metal fabrication facilities helps

Go to Top of Page

1922

United Kingdom
549 Posts

Posted - 19 Jun 2010 :  10:02:17  Show Profile  Visit 1922's Homepage  Reply with Quote
Very nicely done. Are you doing both sides of the car, or has it just rotted on side that's always in the muck (the passenger side)?
Go to Top of Page

JPSH120

United Kingdom
1168 Posts

Posted - 20 Jun 2010 :  08:51:54  Show Profile  Reply with Quote
Both sides need doing, both totally rotten.

Hopefully the replacements will last 40 years like the originals did?!!

Go to Top of Page

1922

United Kingdom
549 Posts

Posted - 21 Jun 2010 :  13:39:00  Show Profile  Visit 1922's Homepage  Reply with Quote
My first Rapier (the '73) was the same. My solution was less complex and much more home-made than yours. I used zinc coated 18 gauge for the main part of the panel with a 3mm thick steel plate (about 4 inches long) at the point that the damper bolts on. Then lots of rust proofing (can't remember what I used) - that was back in 1989 and it's still solid.

There's a couple of bubbles near the damper mounts on my '68 - so I might be doing the same job on that too .
Go to Top of Page
  Previous Topic Topic Next Topic  
 New Topic  Reply to Topic
 Printer Friendly
New posts at top
New posts at bottom
Jump To:
Sunbeam Rapier Owners Club © 2009 Sunbeam Rapier Owners Club Go To Top Of Page
Snitz Forums 2000